Monday, February 27, 2017

in home sewing space - blog hop

hello all!
for those of you hopping on my, i'm emily and i'm about to share with you my sewing space!  i've joined this blog hop with jen frost and a few others, so be sure to check out there links at the bottom of this post.  this is my first blog hop, so i hope you enjoy!
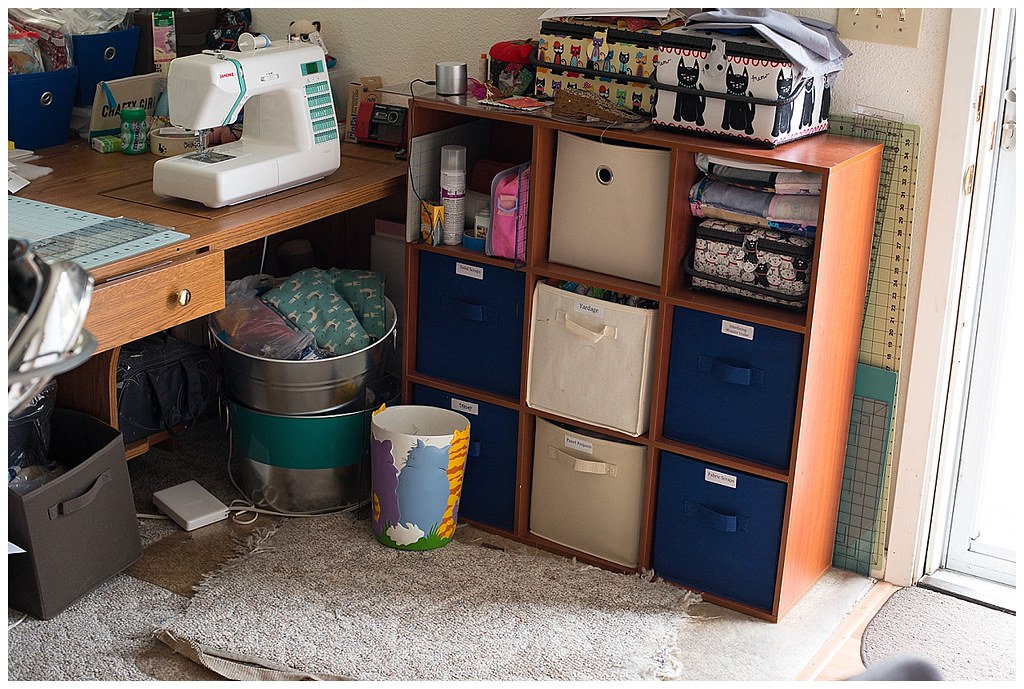
since i'm at home with the parentals still, i share my sewing space with my mom.  now now, this is a plus because we have a great sewing table and storage system next to it.  i'm going to focus more on where my stuff is currently stored within this system, as well as my own personal fabric storage in my room.  a few things you won't see, due to the fact that my hazel hedgehog project has exploded, is the location of our ironing board, as well as the sewing table in it's entirety.  we (ahem... my mom) just got this storage shelving, so now that it is all put together and phase one of organized, it's good to have it documented now, should it get changed in the future!
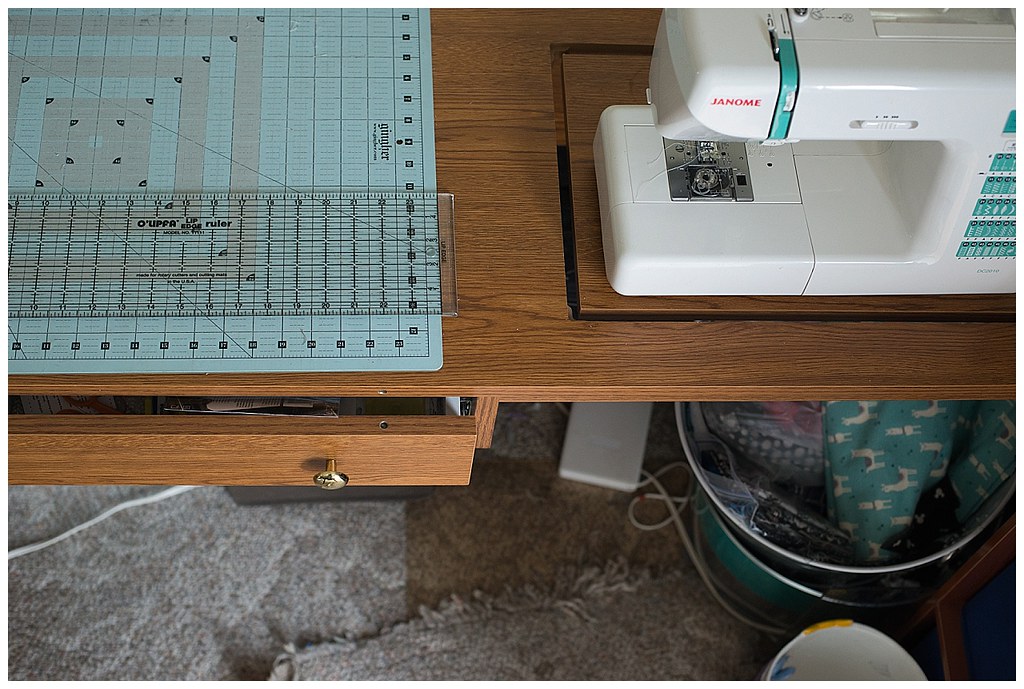
often, my mom's machine is where my cutting mat is, but being able to have the open space for an 18x24 mat is awesome.  reduces having to go back and forth across the room for a solid surface to cut on.  when i'm doing a paper piecing project, it is fantastic, because our ironing board is just to the left of the sewing table.  honestly, i don't think i was really regularly sewing before we had this table set up.  at least i cannot remember what our set up was!  in my bedroom i have a left handed desk that i used to have a machine on, and will likely sneak out with me when the time comes to move on out.
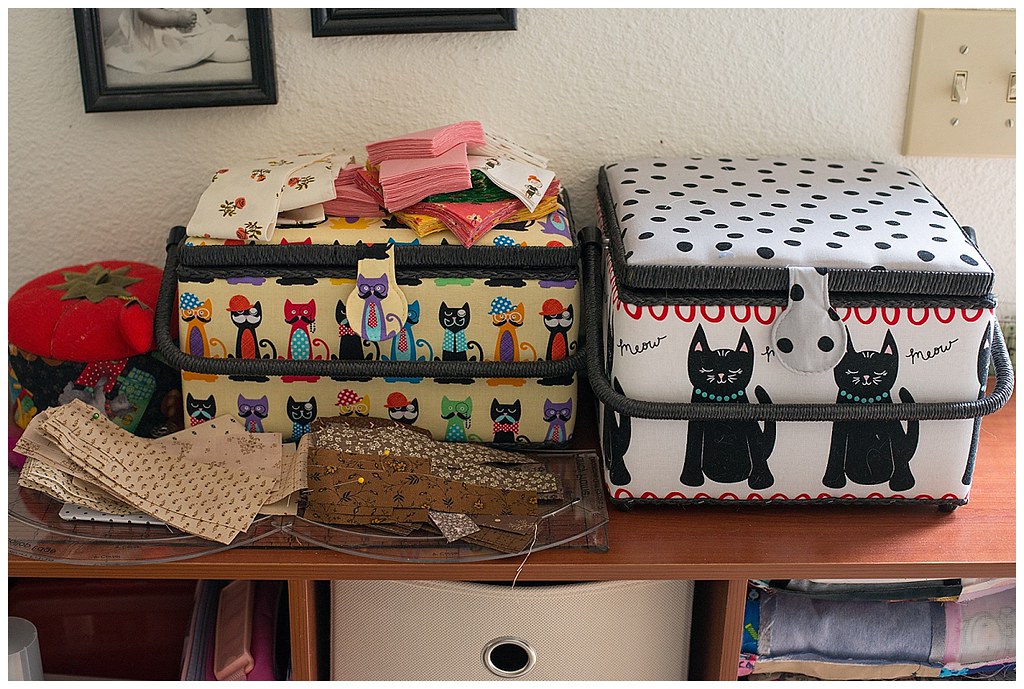
on top of our new storage area, are these sewing boxes.  it currently stands as my holding area as i'm cutting out pieces for quilt.  the small squat one on the far left holds all the safety pins i use for pin basting.  since discovering spray basting, i haven't used them too much recently.  the yellow box is my mom's, and it held fabric that is now flopped all over the ironing board currently being cut in to hedgehog portions.  as you can see, currently there are pieces for two different projects stacked around.  the brown is for my hazel hedeghogs, while the cuts from the tiger lily line by heather ross are for a few swoon 16 blocks.  next to the yellow box and the piles of cut fabric is my sewing box. and here... take a peek inside!
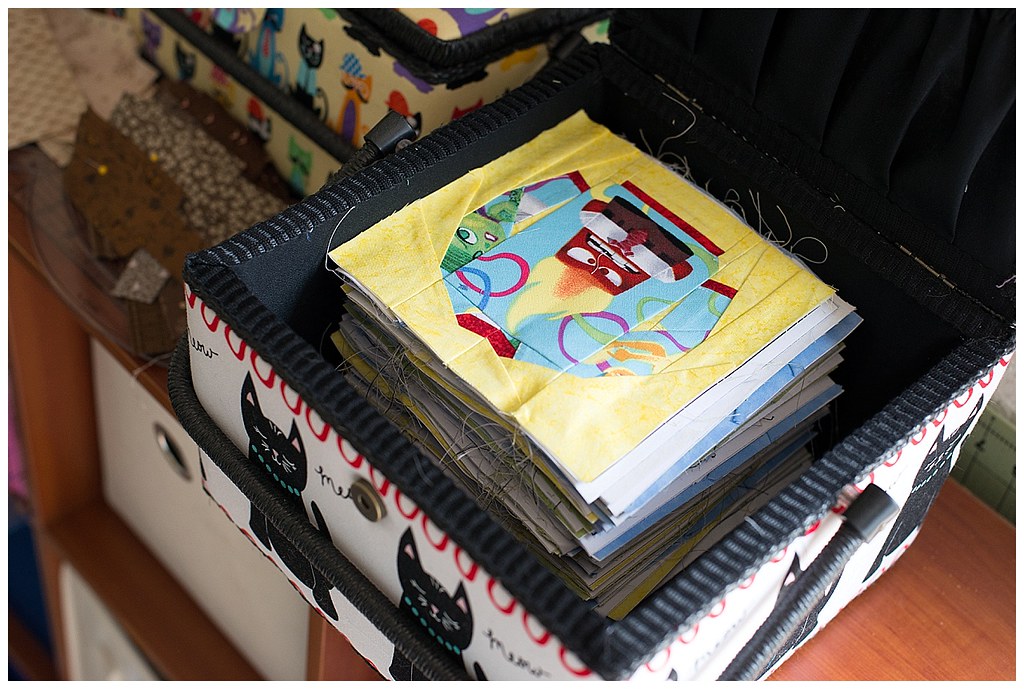
all my disney sweater blocks currently live in here!
it perfectly fits all 81 of my blocks from the ugly sweater block sew along that i did solely in disney prints.  i'm sure they'd fit a bit better without the paper on the backs, so maybe that will be phase 2 towards completing this project.  having these boxes has made for a fun way to hide things that would usually just be stacked up all over the place.
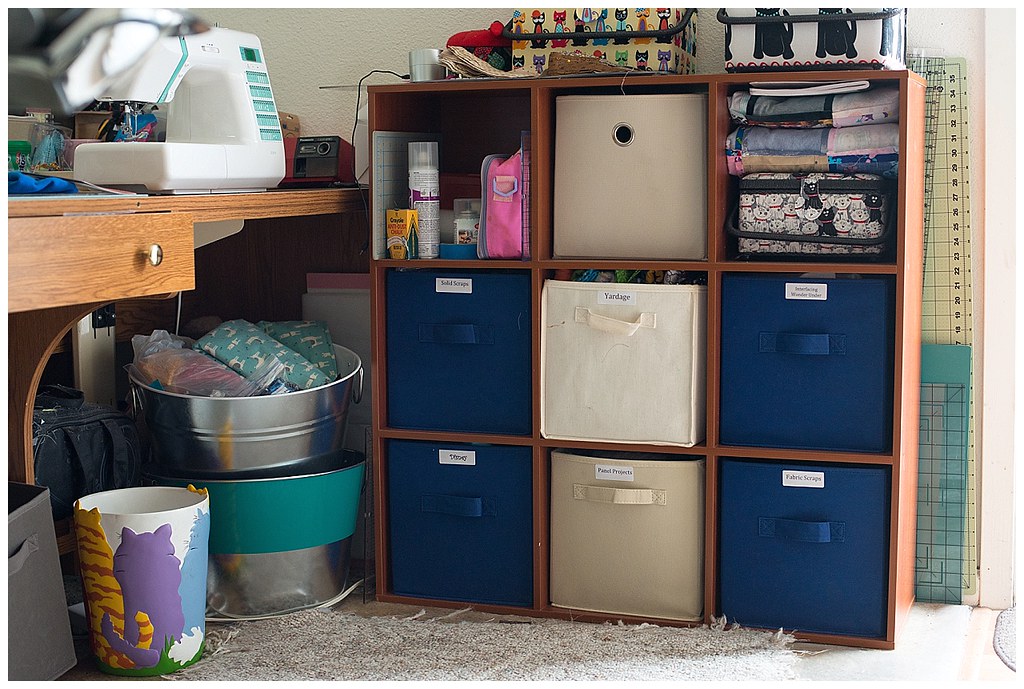
this storage system is great for sure.  previous to this cube set up, we had a book shelf that these 10x10 boxes sort of squished on to, but with the new year it was time to upgrade.  my mom did the labeling, which has been great with my year of stash busting going on.  majority of these are filled with fabrics that have been used previously and left with a fair amount of fabric afterwards.  as you can see in the bottom left corner, my disney fabric stash is quite large :)
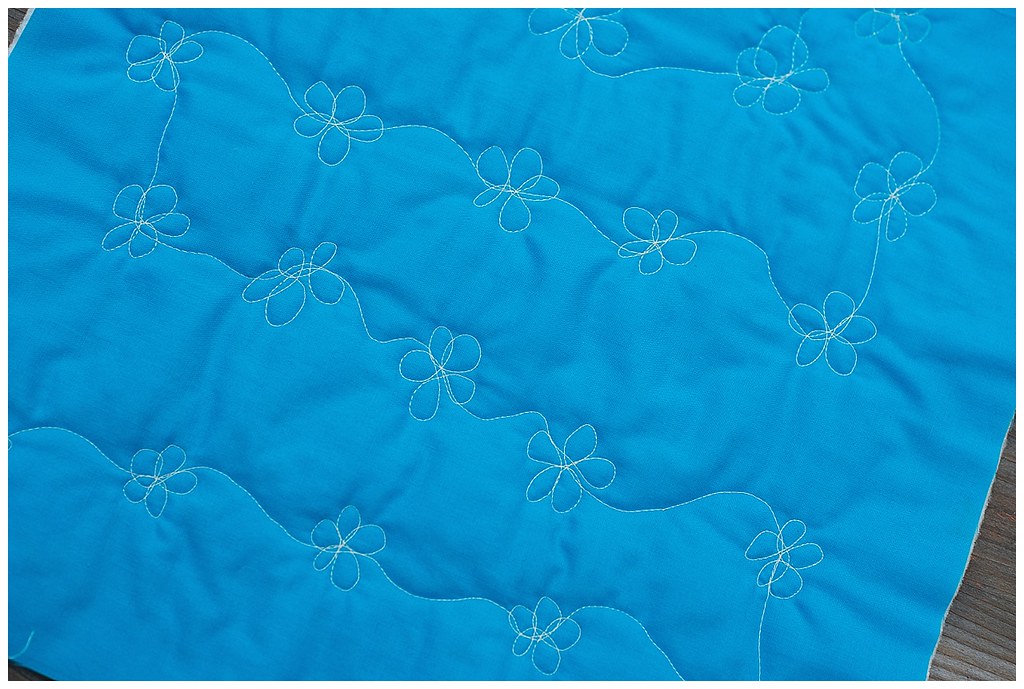
we currently keep our cutting boards and rulers behind the shelving unit, which is great for them to be out of the way and not getting stepped all over.  additionally, you'll see those metal drink tubs.  i use those for storing strips of fabric cut for a certain project. last it was used for the fandom daisy chain, which made it easy for me to reach in through all the different sized strips and see what i wanted without having an entire mess all over the floor,
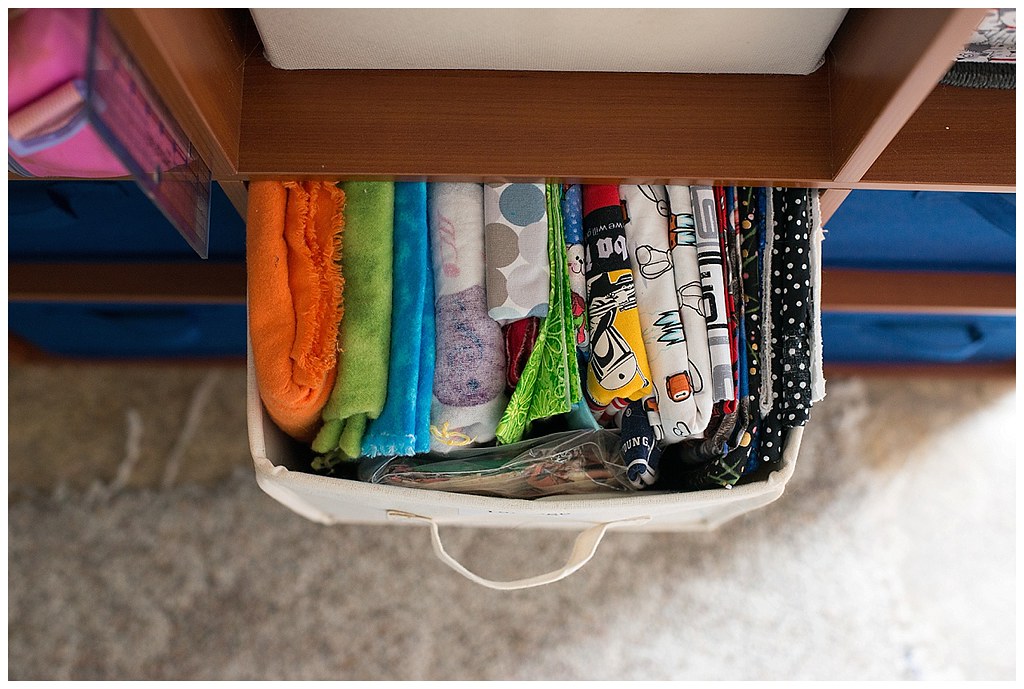
here's a peek inside the "yardage" bin, including previously used flannel as well as fabric yet to be use (but intended for a project).  each bin is organized and not just tossed in there like it used to be.  yeah, it was quite messy.
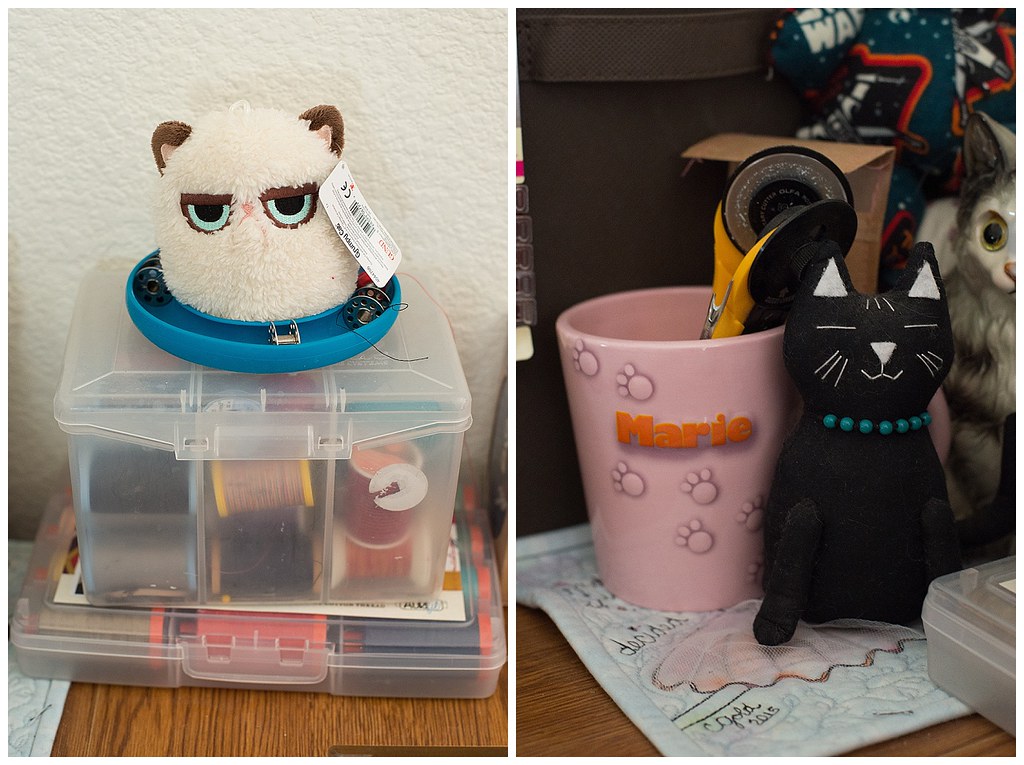
here's my "little things" storage!
the drawer on the table gets jammed if you look at it the wrong way, so i've started to keep the things i need most often in an easy reach location.  all my threads i keep in this little box, with my own wheel of bobbins around this silly little grumpy cat one of my students gave me.  i've been trying to get better at keeping my rotary cutter and scissors in an easy access location, and so far this mug is currently doing the trick.  they are right there to grab, and has worked great with my current cutting board set up.
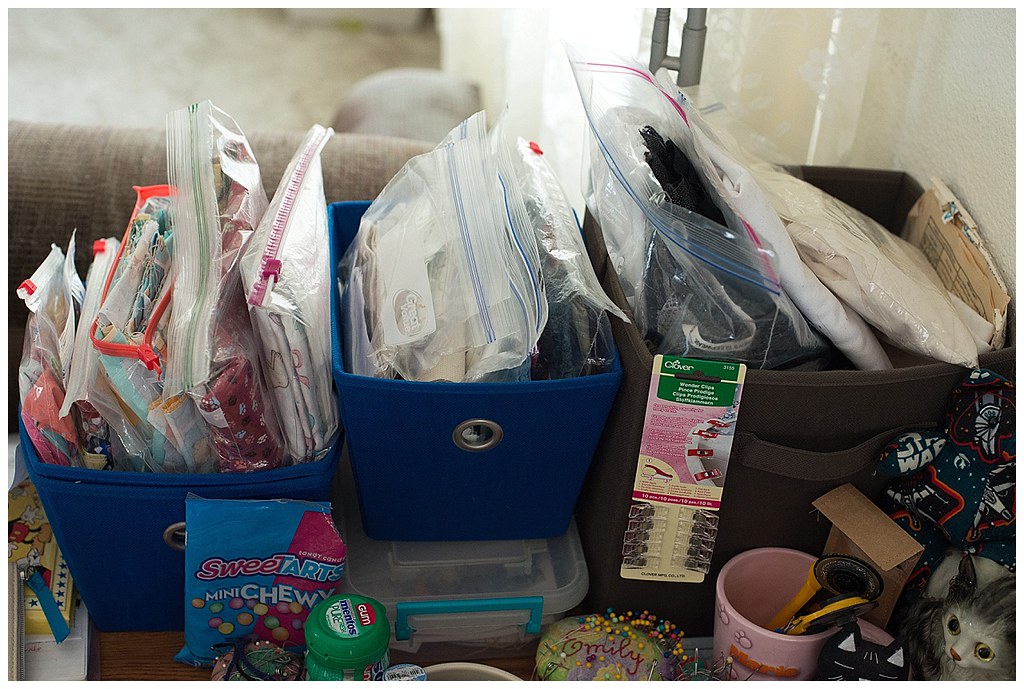
lastly, there are a few smaller bins that line the back of the sewing table for things that just didn't fit within any of the larger categories.  all of these are ziplocked with what they coordinate with (especially in the case of UFOs) and are ready to get stashbusting with.  apparently, this is also where i keep my sewing sweets!  now that you've seen the joint sewing space, let me welcome you to my personal fabric domain!
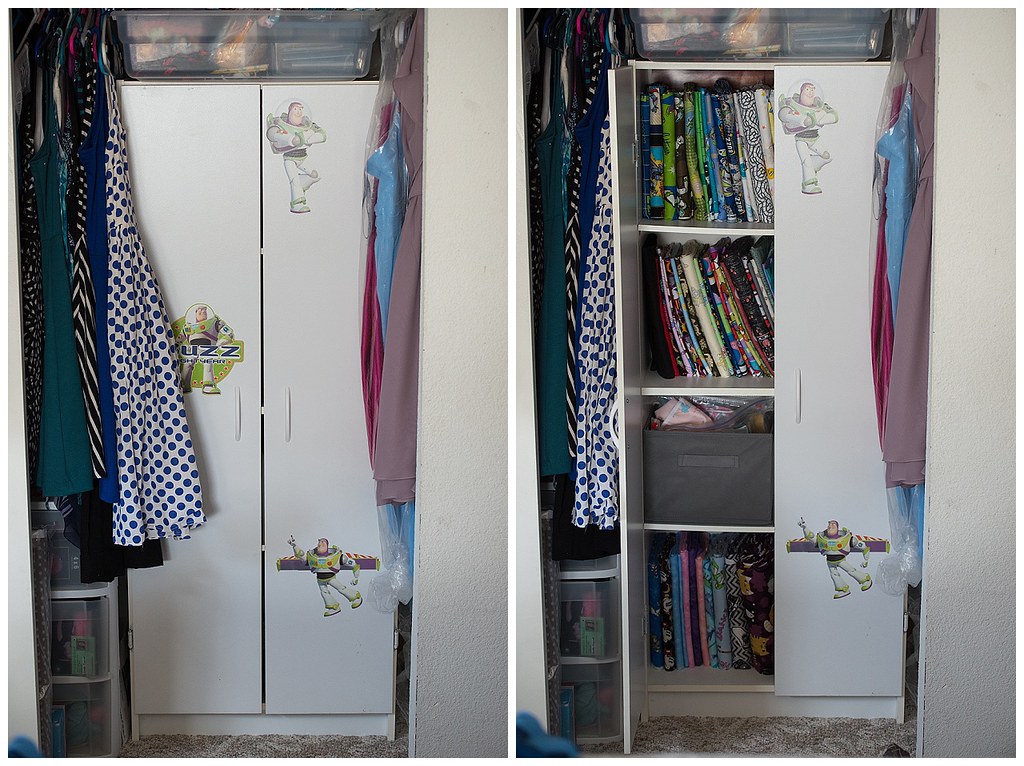
this is where i keep all my fabric that i generally purchase on a whim. yep.  it is in my closet!  it used to be in bins under my bed, but once i bought my new bed a few summers ago that was no longer possible.  i went with the comic book board method, which has worked great getting these all organized and easy to view.  while photographing, i was working around my bed being in the middle of my room, so i apologize for wonky angles.
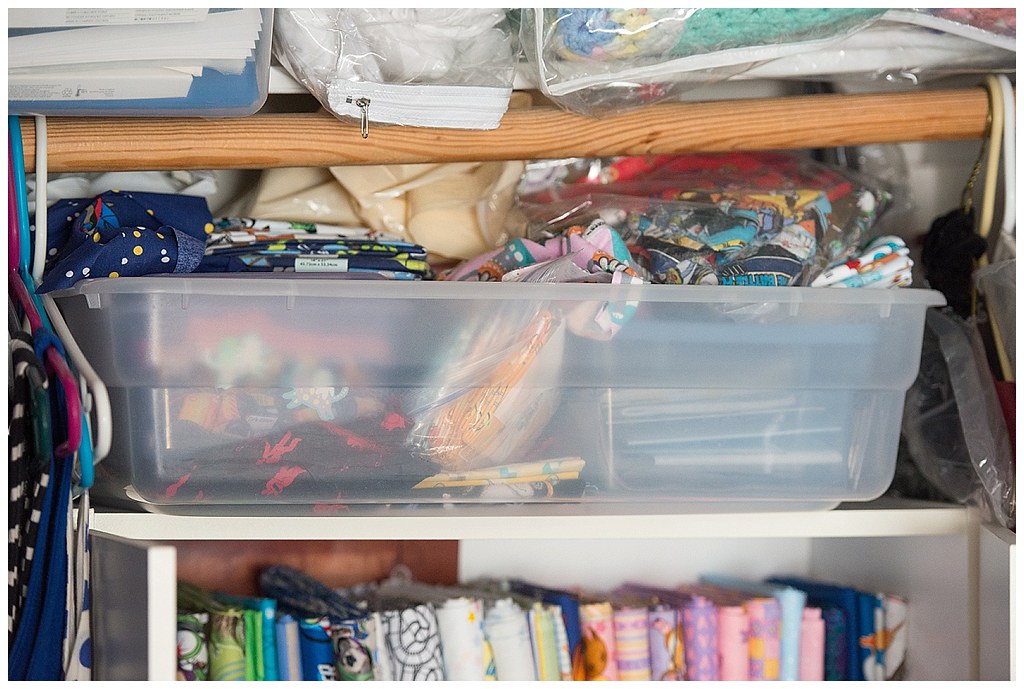
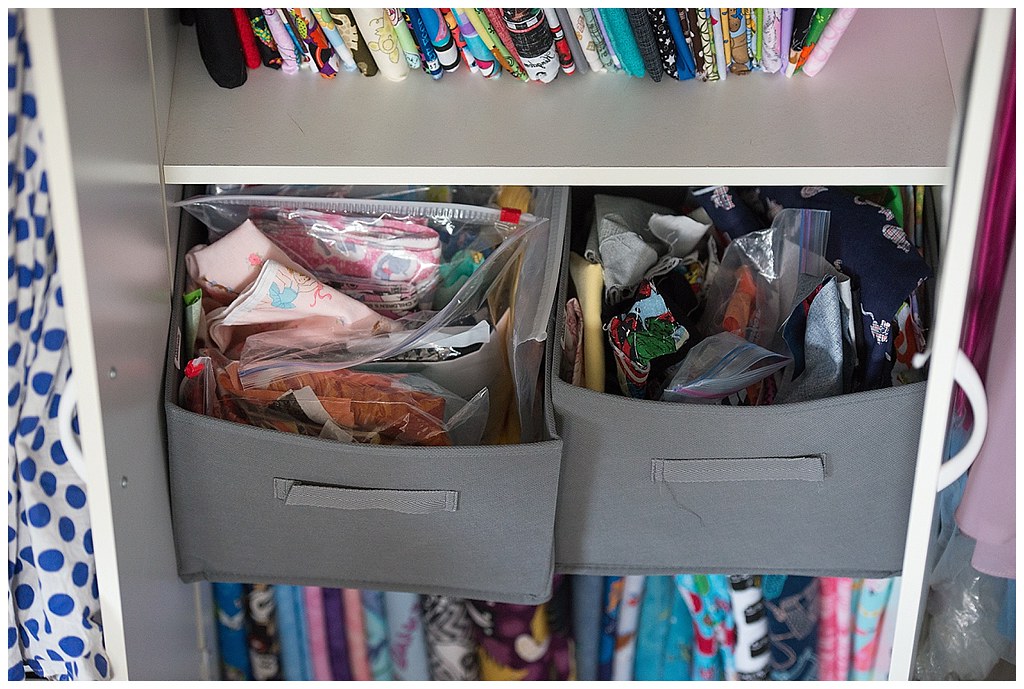
on the top, i have my miscellaneous tub.  random fat quarters generally live in here, as well as bags of fqs for projects purchased in both alaska & colorado.
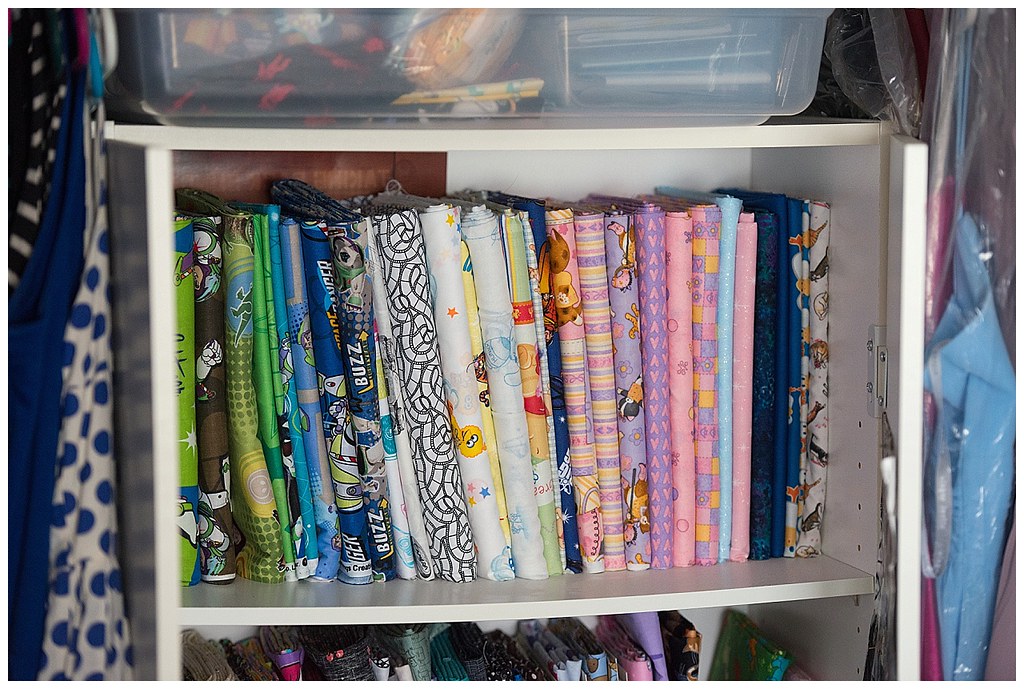
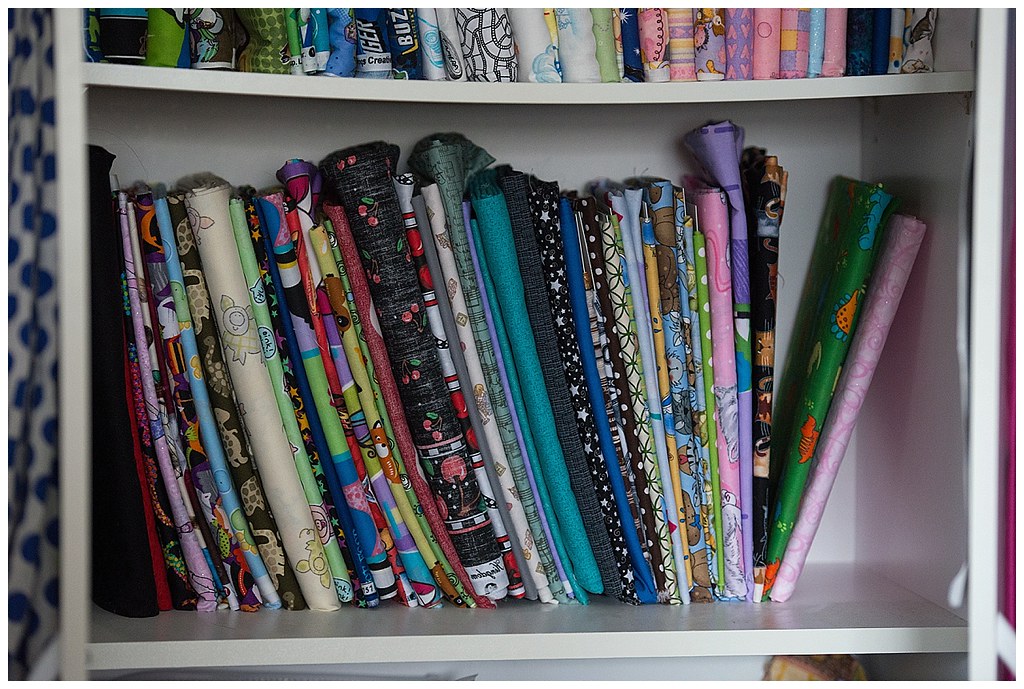
shelves one and two are my cotton prints, most generally purchased from the novelty section of joann fabrics.  over the past 10 years, my desires to sew had been in and out, and when it was in, i got in the phase of just buying fabric because it was cute and not knowing what to do with it really.  i know i keep saying it, but i'm really trying to stash bust.  problem is, my grandma keeps giving me stuff.  like....
some of the contents of this shelf.  there is a bag of orange fabric waiting to be used for something, plus other random stuff.  this is pretty much a catch all of fabric pieces, as you can see by the bin on the right.  the doors on this cabinet allow me to close up and forget this semi mess is there.
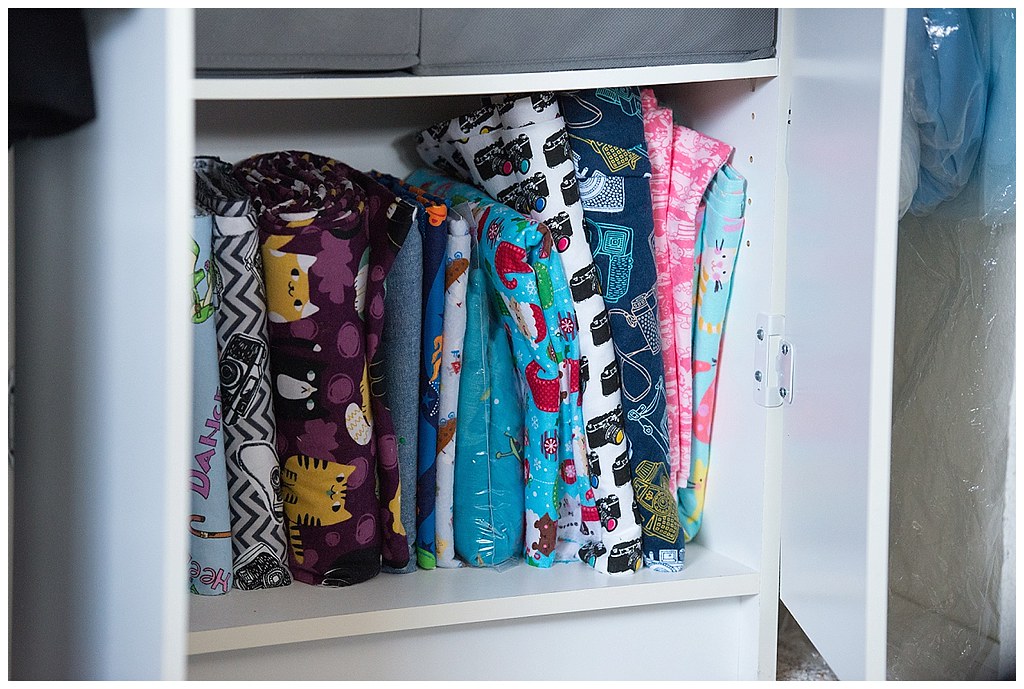
my last and bottom shelf is all flannel and one random flat bed sheet.  most are three yard chunks that i bought on a whim for someday pj pants, or simply because there were cameras on it.  i do love flannel backed quilts, so hopefully some of this storage will clear out this year as well :)
thanks so much for stopping by!  i'd love to hear any of your thoughts on storage, as well as if seeing mine helped inspire you in any way.  be sure to hop on over and see the rest of those hopping along with me by following the links here:
faith & fabrics - jen 
sunflower stitcheries & quilting - raylee 
quiltytherapy - tisha
adventures in life - sherry
emkie designs - emma
hudson valley quilts - anne
cat approved quilting - eleanor
stitchin at home- cindy
fabric nerd - ivete
fabric engineer - amanda
happy monday, everyone!

Friday, February 24, 2017

star wars strip quilt for an itty bitty jedi

when my coworker drew told me his wife was expecting, i got super excited for him.
and then the internal "do i make him a quilt?" struggle began.  i didn't want to set the bar that i'd make ALL my coworkers baby quilts (granted, not many of them are in committed relationships like so) but he IS a pretty cool guy.  so clearly by this post, you can tell that i decided to make him a quilt.  and it worked perfectly with my stash busting fest!
i had plenty of scraps left over from melissa & jared's fandom daisy chain and a good chunk of that was star wars.  if you know drew, and even if you don't, you know he loves star wars.  i put the thought of making it for him, and then when carrie fisher passed away, that triggered me to start on this quilt top for him.  i busted it out in a day, and only had to pick up one fabric as a filler (the r2d2s) and the backing fabric.
i was glad i still had some of this print that had the actual character faces on it, since drew is very about the characters.  i kept it to the original films the best i could, which worked well with the black, blue & white color scheme.  i was even able to include some of the blue sparkle to help break it up but still be a manly sparkle ;)
i loved that i was able to find this star wars flannel.  it was the perfect baby size, and tied in with the front of the quilt so well.  i used one of the prints i had the most left over of to use as the binding, so you can see hints of millennium falcons down the side.
and the remaining tag count down continues!
well, at least temporarily.  my mom said she was able to find and purchase more of these tags for me.  the order still says pending, so they might be here some day.
the little one (baby luke.  i bet you can guess why!) came over two months early, so i managed to get everything done in time just after his arrival.  last weekend, one of my coworkers threw drew & his wife a star wars themed baby shower.  since they already had the quilt (and pillowcases) that i made them, i busted out a few little burp cloths for them to use once they have the little guy home with them :)
i also found these awesome number & counting books on amazon that were right up their alley.
abc-3po
obi-123
the shower was great and from what i hear, baby luke is down to just one more test to pass before he can come home!  i am so excited to meet this little peanut and see these two grow as parents to a little jedi luke.

Wednesday, February 22, 2017

fearless fills and frills - free motion quilting class

finally catching up on talking about my free motion quilting class!
i have to say, i quite enjoyed this one.  the class had about 6 of us in it, which was nice.  the experience level was mixed, from ladies who had been doing fmq on their machine forever, to people like myself who had just taken the one class.  this class really built on the last one, giving us the next level of where to go.  we stitched ferns, strings of pearls and shells as border pieces.
here's the entirety of the first block we stitched on.
we started with the fern by stitching the middle section, then doing the right fronds (bottom portion) and the the left (top).  jenny lyon, our instructor, mentioned right handed people usually have a tougher time on the "left" side, but i actually found that size easier to stitch.
the shells were pretty easy, having done the double drip previously.  getting the angle right was a little tricky, that's for sure.  also, the string of pearls were... okay.  perfect circles aren't my jam really, but neither is things in straight lines.  i much prefer the "all over" look of things.  these all look too organized for my personal quilting style.
these two were a little more my style for sure.  the cute little scallop hills were fun.  some a little wider than others, but it gave them a bit of character for sure.  i REALLY like the one next to it, which she called stacked bananas.  just a bunch of looping back and forth, changing directions whenever felt fit.  this one was also very similar to the double drip from the first class... which might be why i liked it so much.
the other one i didn't get a closer up one of this jenny gave a different name, but i know it is called orange peel.  it requires a grid, which adds time to the project, but it was a nice little stitching motif.  it could be fun to do bigger as well, so that could be a potential for the future.
these second two were interesting as well.  the first one on the left was basically breaking the quilting in to chunks and essentially just echoing the lines zoned out.  almost like a topographic map... at least i think that is the name that i remember from earth science.  anyways, the second one is swirls and bubbles.  this one was a cute motif, but i had a bit of a struggle to get my swirls to lay the right way to not look funky.  the little bubbles helped balance things out for sure.
things i took away from this class:
more motifs.  obviously.
learned about using things as borders.  not sure if this is something i'll use, but i know how to do it now!
benefits of gloves/something grippy.  now, i'm the only one who showed up to class without gloves, but it wasn't required so i wasn't being a rebel.  having long fingers anyways, i have a hard time buying gloves because they really don't fit.  i did borrow some hand grip things from jenny, from a brand called "the steady betty."  these "betty bands"seemed to do the job awesomely, and i didn't have to worry about my fingers being the right length (or not, in reality).  should i see more fmq becoming a constant thing in my sewing future, i will likely invest in a pair of these.  next time i end up at meissner's, i'll also likely look for a straight stitch plate for my machine.  i heard it does wonders for piecing as well.
and there you have it!  part of me wishes that i did my 21 day practice after this class because it would have given me more motifs to practice, but i can also see how that would also be overwhelming.  oh the struggle!  i believe meissner's offers one more free motion quilting class that i am debating taking, so hang tight to see if that happens.  in the mean time, i'll be working on catching up blogging and block piecing so be sure to pop by my instagram to see what is happening :)

Thursday, February 9, 2017

free motion quilting - days 14-21

the end is here!
after last week's slump and being able to laugh at my flowers, it was much easier to convince myself to knock out the last week of stitching practice.  i tried a few new things that i saw lisa attempt once she started her own free motion challenge at the start of feburary, and while they look mostly like what they were supposed to, they totally weren't my jam.  aka the bows.  but anyways.  i have officially completed the 21 days of free motioning, and this upcoming saturday is my next class on the subject matter.  here's this final week of blocks:
2/1
2/2
2/3
2/4
2/5
2/6
2/7
2/8
so in the end,
i've come to find i like the wandering all over styles, such as pebbling & the double drip.
if i was continue this even longer, i'd probably try and figure out how to make my loops and flowers look a little more randomly wandery.  if that is even a thing.  throwing some extra loops in between totally helped out, but i am still hoping to one day feel confident in my all over "doodling" if you will.  or maybe i'll just keep my training wheels on with pantographs for a little bit longer.
stipple.  yeah, it threw off my groove for sure.  it put me in a mindset of aiming for perfection instead of just going with the groove.
can't remember if i've said it before, but i don't feel that i will be quilting anything major on my machine with these skills, but as always, being able to have a skill and not use it is better than not at all.
but there you have it, the conclusion of my 21 days of free motion quilting fun!
i'll be sure to update you on whatever adventures happen from this weekend's class with jenny lyon!

Thursday, February 2, 2017

free motion quilting - days 7-13

well here we are again, with another update in the world of free motion quilting.
days 1-6 seemed to be pretty okay... but it wasn't easy to make it to day 13.
to be honest, this week i wasn't really feeling it.  at all.  you'll noticed i didn't get it done on friday.  or on sunday.  and i almost let it not happen a few more times.
i was ready to be a quitter.  it wasn't really fun anymore, and it started to feel more like a chore than anything else.  which is exactly how i get when it comes to going to the gym sometimes (hence why i haven't done that in a week or so.  oops.)
on monday of this week, i decided to get it together, make all my quilt sandwiches for the remainder of the time and just do it so i didn't feel any regrets.
back to fmq talk.
so i made my sandwiches, and then on monday just decided to try something new.  i decided to meander and stitch some flowers, and i got a good laugh out of myself.  i could at least feel myself being entertained by the flowers (or lack thereof in some cases) and i was starting to enjoy it again.  no more frustrating stipple practice nonsense. no more doing just what i had seen done in class.  just doodling and stitching.  and entertaining myself with some very squashed flowers.
1/23
1/24
1/25
1/26
1/28
1/30
1/31
so this week i learned:
looping each flower petal instead of doing a figure 8 is easier (at least for me)
don't do something if you're not in the mood (see 1/25... i only stitched that day just because i felt like it had to be done.  not because i wanted to fmq)
aaaaaand... i'm over halfway done!
if i keep to a daily pace from here on out, you'll see another post next thursday or friday just days before my next fmq class on the 11th.
here's to another hopeful week of fmq-ing.
but also one more week until i feel like i can get back to block piecing :)