Showing posts with label DIY. Show all posts

Friday, October 30, 2020

not a girl. not a robot.

Jason: And to Janet, the best robot. 
Janet: Not a robot. 
Jason: Girl. 
Janet: Not a girl. 
Jason: And straight-up hottie. 
Janet: I am attractive, yes.

2020 is SUPER WEIRD guys!
i didn't even think about making a costume this year, but who really has anyways?
though i did realize that i never did the post i promised from last year's halloween costume.  so, 365 days later... here we are!
disclaimer: if you have not watched the good place, please note that i'm not a flight attendant.  also, if you haven't watched the good place... go do so now.  4 seasons of delightful mike schur feel good fun.

watching the series, janet was pretty much my favorite character.
seeing her evolve and grow from being not a robot and not a girl to a straight up awesome individual was so much fun to watch.  when the series was ending, i knew i needed to be janet for halloween, while she was still "relevant" as a tv character.  
granted, she'll always be relevant to me... but that's neither here nor there.
so since we're a year behind, here's some photos i made my dad take this past weekend so that i'd have something beyond dark phone photos for y'all
i was so determined to find the actual fabric for janet's shirt somehow, some way... and after searching for a good long while... i did!
and of all places, it was project runway's favorite fabric shop, mood (thank you, mood!)  now finding a pattern for all the pieces though... THAT was an adventure.  the vest pattern was sized down from something else we already had (because apparently finding vest patterns are quite difficult these days, and the skirt came from a few rounds of buying patterns that i thought were the right style but then i'd compare and go "nope"
since i'm a quilter by nature, i absolutely did a test run on this shirt pattern before cutting up my fancy mood fabrics.  so somewhere around this apartment is a very harry belafonte blue and yellow ruffle front shirt, because i ran out of fabric to do a practice one in a solid color.  it's SUPER attractive, really.  the worst part of this was the zipper, because i just couldn't quite do it right.  i know i pulled it apart at least twice, and left it for my mom to do.  two thumbs up for having a costumer mom who is WAY more familiar with stretchy fabrics and such than i am.  i also sized down the vest a little too much, so i'm quite surprised i didn't hulk out of that thing at any point.
i am still super stoked with how this all came together, even if people thought i was a flippin' retro flight attendant.  maybe at some point we'll still get to throw together the good janet/bad janet/michael combo with my sister and my dad like we had planned for our dance recital... unless we come up with some other crazy idea to go with instead!
and for good times sake, here's some halloween throwbacks from 2019 in the costume.

Thursday, March 20, 2014

wedding favors & garter - amy's wedding crafts

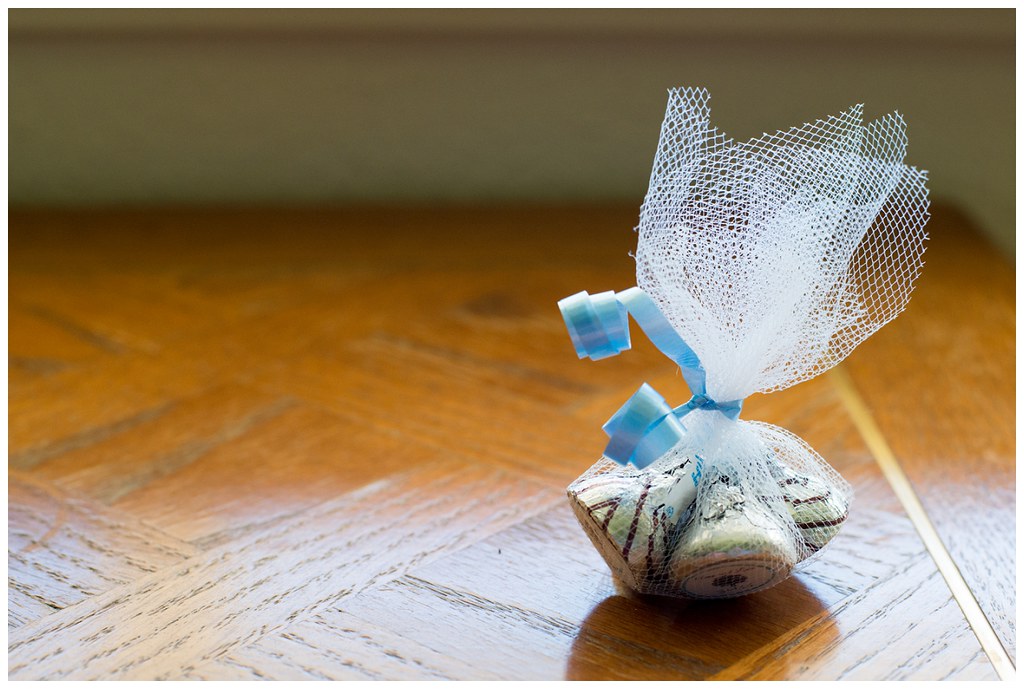
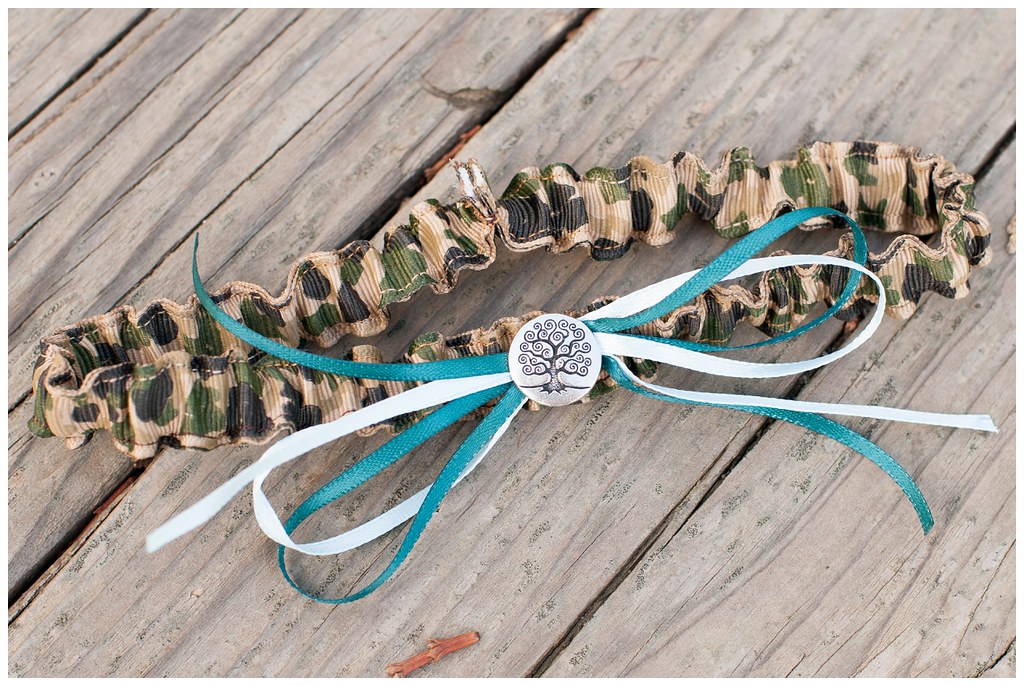
before i can get to the big shaBAM post, i gotta show off these little guys.  one i can take credit for, but the other was all amy.  and they turned out so cute, i have to share the photo of it and all the diy-ness that went in to it.
back on the nurse apron post, i mentioned that we had a favor making hooplah that didn't go quite as planned thanks to the printer issues.  well, that day we got ONE favor finished... and this was that one favor.  amy's plan was to make hugs & kiss bundles for her wedding favors. (which did happen.  just on the bachelorette party weekend)  sarah designed the little logo (which has a tree on it, amy & luke and the 3.9.2014 date on the bottom) and was eventually turned in to stickers.  after creating an army of hugs & kisses on the table, i cut squares of tulle that jenny counted out.  on the bachelorette weekend, amy & jenny cut the ribbon, sarah & melissa made the bundles and amy & i tied them up.  jenny & i curled the ribbon ends, and wham bam, they were all complete.  clearly they were a hit at the wedding, because some people were very bummed theirs was taken before they could pick it up.  good idea, amy!
for amy's bridal shower, she received a camo & lace garter to wear for her wedding day.  alas, the garter didn't come with one to toss.  madness!  so after my garter creating experience for erika's wedding (as in it was super easy) i busted out this little number for amy.  the hardest part was finding a little something to fancy it up a bit.  i looked for deer... no luck.  i looked for ducks... nope.  i even looked for a simple little paw print.  nothing.  i found this little tree button at beverley's which reminded me of the tree on the favors.  when i saw it, i knew it had to be.  i stitched up this little garter (the ribbons on it are in her wedding colors) and it was good to go.  turns out, amy decided to keep this one instead of the other one.  winner!

Thursday, January 30, 2014

amy's bridal shower invites

tomorrow night after i get off of work, jenny and i will be heading east for an exciting adventure.  saturday is amy's bridal shower!  i've known amy since i moved here in 1999, and she has been quite the friend after all these years (15 years... sheesh)
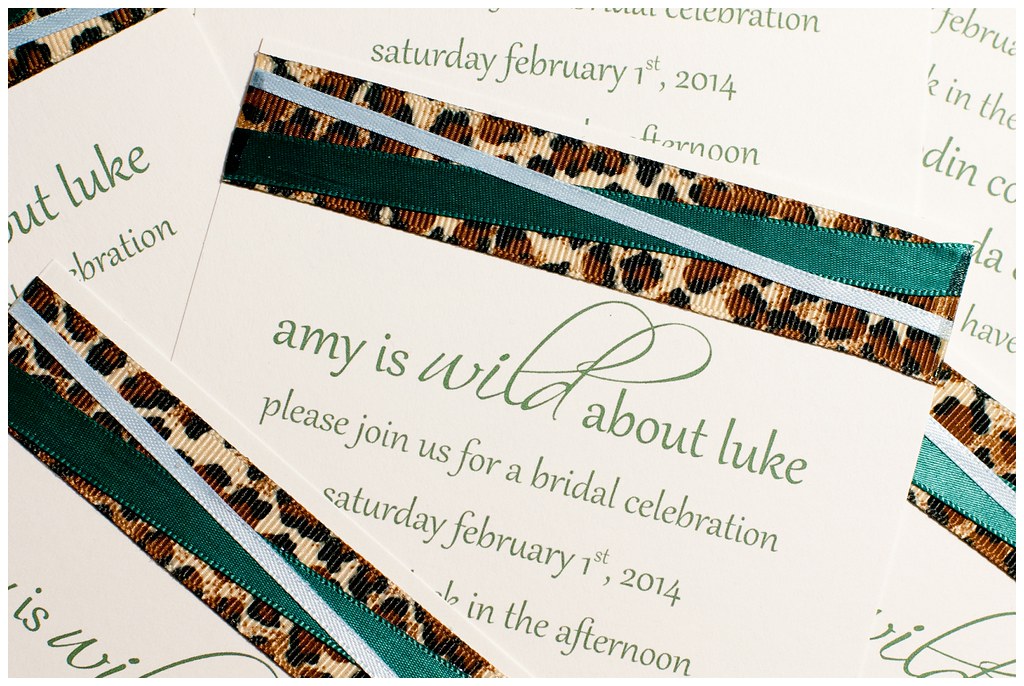
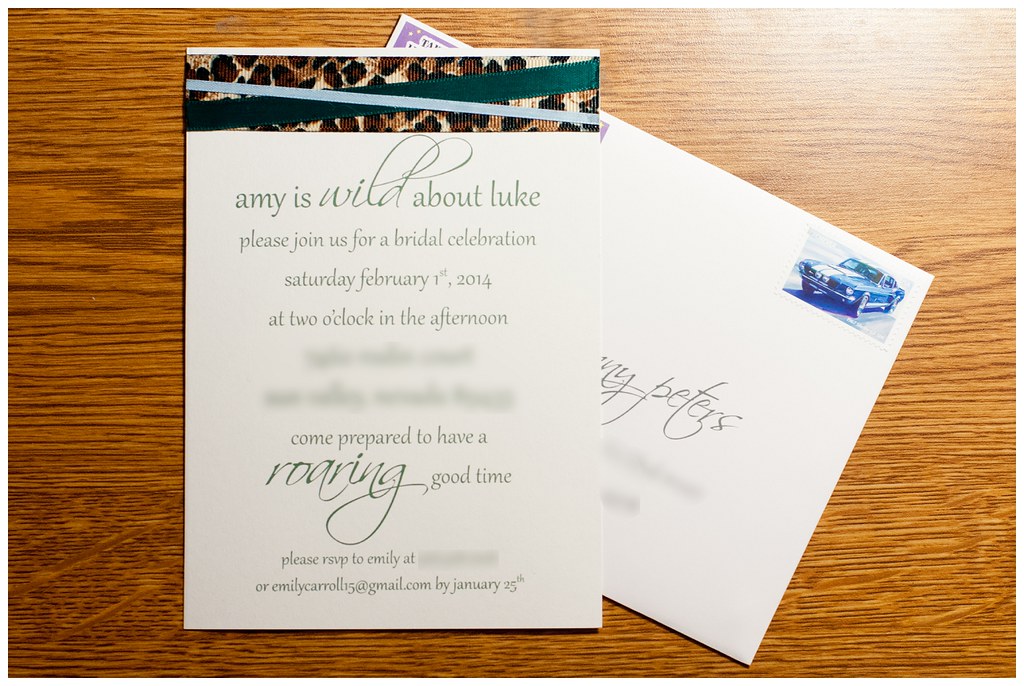
since her maid of honor is currently stationed in japan with her husband and won't be here until the wedding, jenny and i took it upon ourselves to throw amy a fantastic bridal shower to celebrate her with a bunch of ladies for her upcoming wedding day.  i thought today i would share the invitations i came up with for the extravaganza, since i am quite pleased with how they turned out.
i actually got the idea for amy's invitations as i was driving to erika's birthday dinner back in december. i had a vision for using amy's wedding colors tied in with various animal prints to fit our always imagined jungle/lion king theme... more on that after this weekend.  so after dinner, i ran next door where there was a joann's to see how possible my idea was.  i took pictures of different spools of ribbon, paper options, and everything i could think of to make things come to reality.  i went home, found some fonts and typed of a sample based on things i had pinned on pinterest.
when i went to buy the ribbons, the first bump in the road hit.  the joanns i was at then did not have enough of the original ribbon i saw, so my first improvisation came in to play.  i found this leopard ribbon and played around with the placement of the green and blue ribbons.  perfect.  the next part was finding paper to do the actual invites.  i wanted to do an off white color for the paper instead of a stark white, and i thought beverleys would have been the place to be.  i originally found the paper used for erika's advice cards there in a pack of 50 and that would have been perfect.  except it didn't come in the right color.  after much pacing the scrapbook aisle, i ended up buying a pack of 50 5x7 folding cards and chopping them in half.  this way also included envelopes, which was a plus as well.
once my printer stopped eating paper and i got the envelopes to format correctly, all systems were go!  printed off nearly 50 invites and envelopes and began making ribbons in to stickers.  i used my xyron sticker maker to feed the ribbon through, and then layered them on top of each other.  i trimmed the edges and then used clear nail polish to keep the edges from fraying.  then it was envelope stuffing time.  after i ran out of my own personal address labels, stole others from my parents, hoarded some stamps from jenny and then some... the stack was on it's way.  in the giant stack of all of them, i only got one envelope returned, and that was because i missed ONE with a stamp.  oops.  but hey, it's better than a ton of them being returned.
all in all, i am quite pleased with seeing my vision become a reality, and i cannot wait to see how the shower visions jenny and i have been planning turn out this weekend.  stay tuned for those blog posts to come.  it will be a "roaring" good time i'm sure :)
fonts used:
scriptina
gabriola

Monday, December 16, 2013

weekend wips

and we are officially on to the weeks without school!  thursday was the final day of finals, and after a dentist appointment that morning, one take home final, and then an in class final, and i was home free.  well, after going to work, that is.  but all that effort has paid off.  it looks like i unofficially have straight a's for the semester... something i haven't done in possibly all my college years.  so i'm pretty pumped.  granted, the topics were easy to take in, and generally overlapped between classes.  but i'll still pat myself on the back.  it was a nice way to ease back in to going to school.  but now that is all said and done, it's onward to a month or so of straight up just working and crafting.  and basically working to fund my crafting.  and car payments.  oh glorious car payments!
project a: didn't do as much as i had hoped on this one.  i did get up through strip 13/19 attached on saturday, so that's a plus.  but once i got home from working a shift yesterday afternoon i started with a few other projects before going on to this one, and then got burnt out.  clearing out my dvr was far more my speed than trying to line up strips.  today though, i plan to knock some stuff out.  i just have 6 more strips to go, and then it's onward to creating the "big picture".  wahoo!
project b: this one i worked on post catvent and sucked the energy out of me.  i tied it instead of quilting, then made the binding.  i should have made it a little wider, because folding it over was a little rough, but i think once i start getting it going, it will look nice.  and then, it will be complete.  i guess i officially have 9 days to knock that sucker out.
project c: this one is more of a back burner now, but i know when i get around to doing it, it will go together super smoothly.  i showed jenny the bits of it when she brought me stamps for the bridal shower, and she thinks it is going to look great.  as do i.  because that's how i roll.
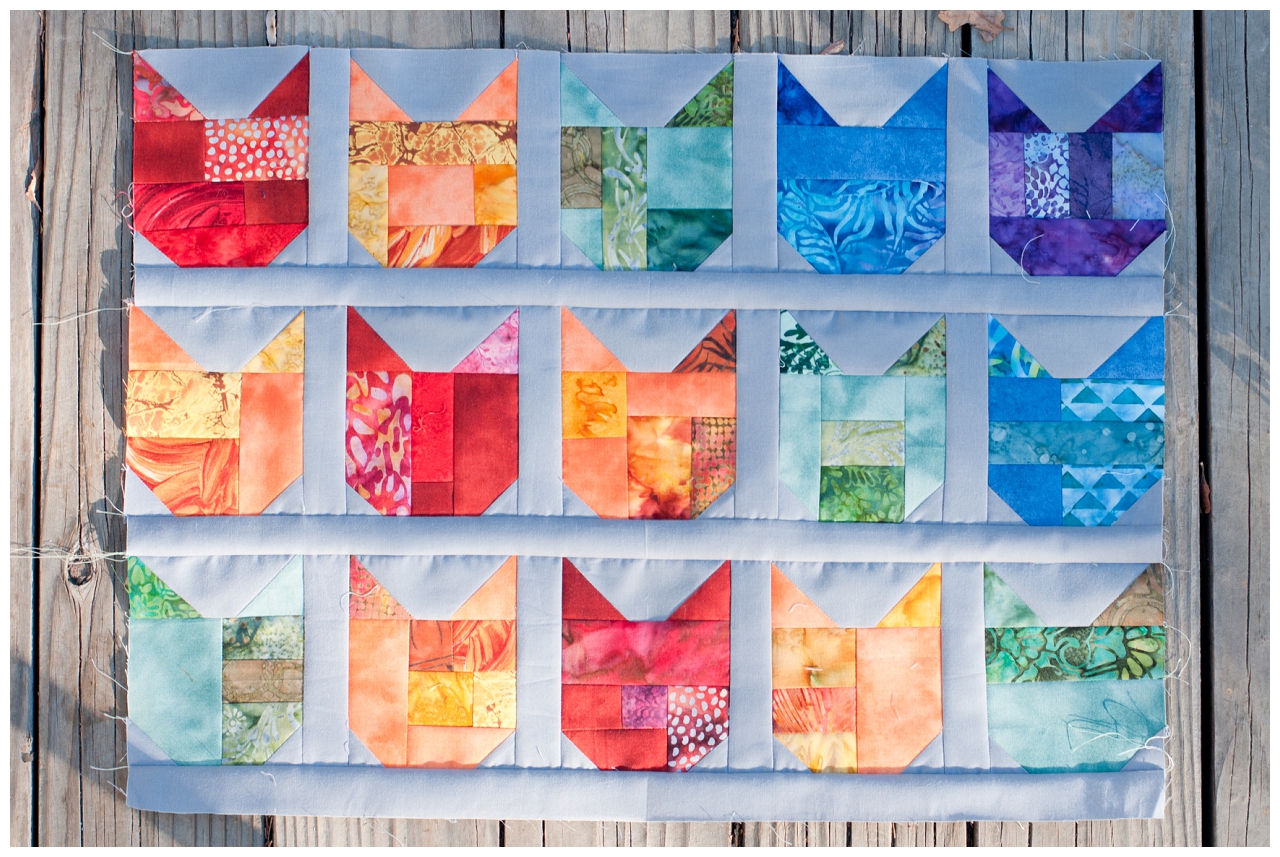
project d: catvent!  as you can see above, i am up to 15 cats complete, and today will be number 16.  i got tired of trying to keep them all in their places (herding cats is totally true... even with quilt blocks) so i lined them up and put them in their place for the final part.  now these 3 rows can't escape and i can see which prints i have already used where.  especially when it comes to those orange cats.  which wasn't even intentional to be the most used color.  it just ended up that way, and coordinates so well with the blog title, and resident fat orange cat.  putting all these blocks together makes them look so much better than being stand alone.  which is totally a case and point for you can never have just one cat.  in this case, you need 25.  or in the lap quilt size... 100.  which may become my next project of sorts.  or at least post march projects.
other projects: pj pants: done.  bridal shower invites: done, in the mail box, and on their way to their recipients.  super pumped with how they turned out.  if i get my act together, perhaps i'll blog them.  meh.  i'll probably blog them regardless.  whether i get my act together or not.
happy monday everyone!

Tuesday, February 7, 2012

the "betsylu" ruby red slippers

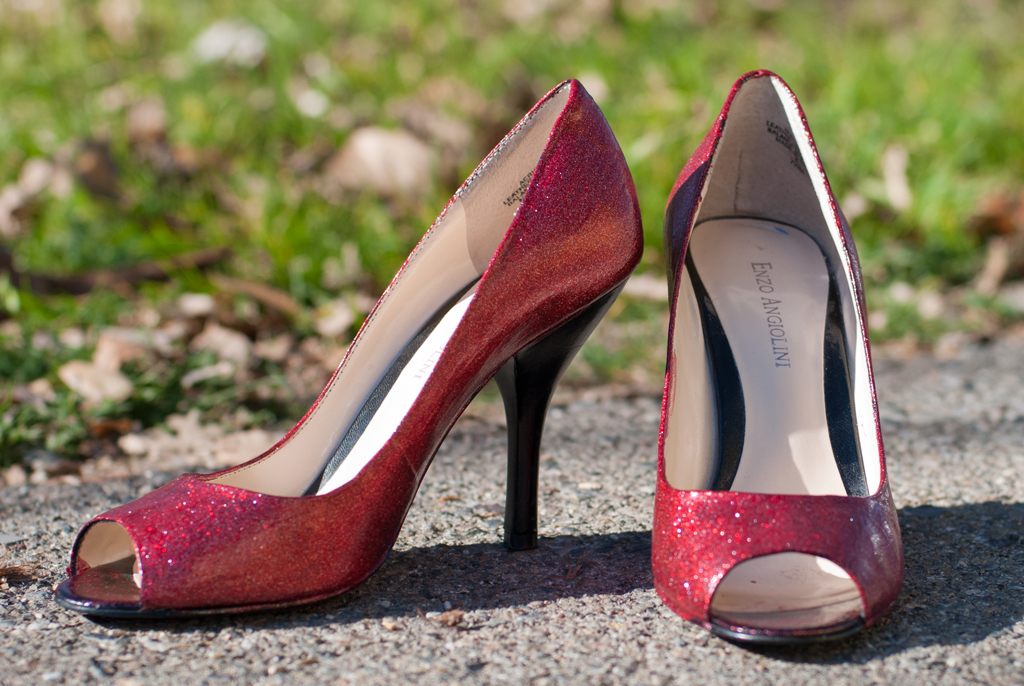
on the other side of my life (the photography business side, of course) i have been actively working to put together my first stylized shoot. nothing super fancy or detailed. just a day of shooting a super gal i know who looks adorable in anything. it started with a red cardigan, and with every fabulous girl comes a fabulous pair of shoes, right? well, she didn't have any red shoes, so i took matters in to my own hands. a little help from pinterest, eco thrift & joanns, and my supplies were gathered. five layers of paint later, and these shoes were straight up perfection.
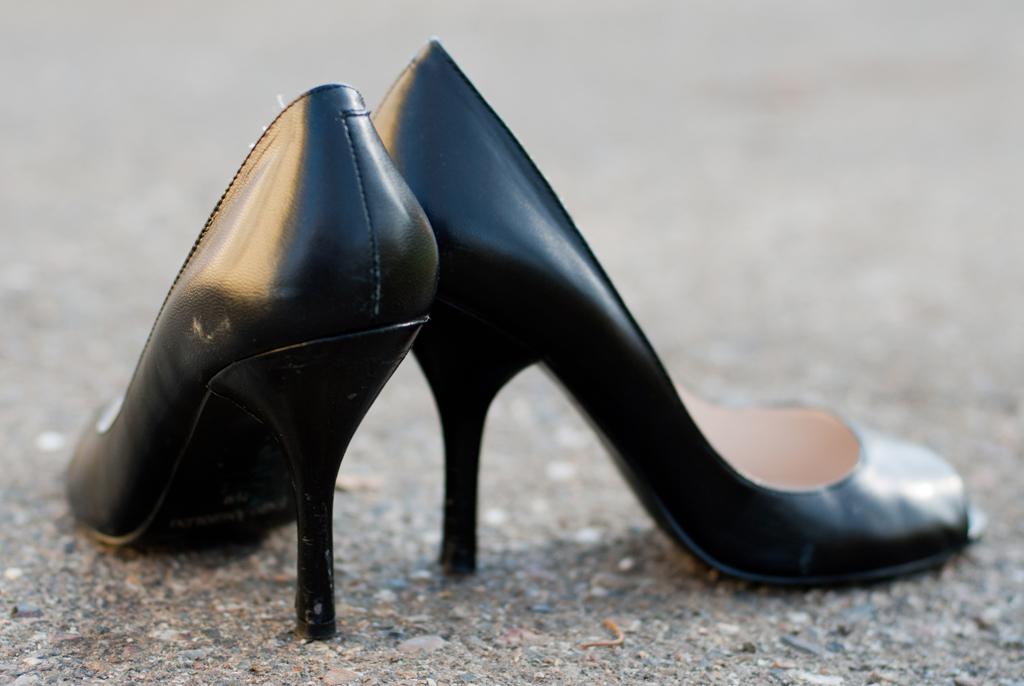
before: you can see the shoes were in pretty good condition. no massive wearing or anything. if i could rock a pair of heels, these shoes would have been totally perfect even without the glittering.
after: i left the heel black for two reasons. 1. because i liked them better that way. gave a little "edge" to them i felt. and 2. because i was too lazy to paint the heel. there, i said it.
as far as the brand of glitter goes... i love it. fantastic glittering without the mess of having to paint on modge podge or fabric glue and then shake glitter on. the dry time inbetween layers was SUPER easy to deal with (about an hour tops) and real easy to clean up. i used the glitter before (different color) when i painted my cap for my college graduation, and i plan to use another color in order to decorate some letters for bridal shower decor.
i've got a few more craft projects up my sleeves to do in order to deck out this faux bride to be, but as soon as the final project is photographed, i'll be sure to give y'all a photo and a link over to the full blog post on my photography page. even better, you can always head on over to the blog by clicking here and add it to your google reader and stay up to date!
glitter brand: folk art extreme glitter by plaid

Wednesday, November 2, 2011

butterfly feet

for some unknown reason, i had a blank canvas in my room. thanks to pinterest, i was inspired what to do with it FINALLY. in september, lorelai, kent & i began an art project for lisa's birthday. this last saturday we finished it up and wrapped it. the easiest way is to just dive right in and show you the messy progression.
step one: gather supplies. paint.blank canvas.cute children.step two. paint feet.kent loves hanging out at my house. can you tell?step three: after feet dry (ours sat for like a month between visits, but you shouldn't need to wait THAT long) add butterfly bodies and wha laa! complete!step four: label and date for future reference.step five: enlist the three year old to help wrap.step six: label present. if you can't tell that says "for mommy" you might want to get your eyes checked. okay, i'm kidding. a little bit.
step seven: reflect. and wish you had two sets of adult hands helping with the painting of the feet. recommend this project to anyone with children, but don't try and do it alone! it can get crazy (refer to step two, the kent photo)